
Many popular blogs and small business websites publish gorgeous photos. You might be surprised to learn that most of these site owners don’t rely on professional photographers for shooting and editing photos. Instead, the site owners have mastered essential photo editing skills themselves. To follow in their footsteps, here are five tips for editing photos that look professional.
How to Edit Photos: 5 Tips for Bloggers and Small Business Owners
- Crop Images to Enhance Composition
- Adjust the Exposure
- Make Color Correction Adjustments
- Eliminate Unwanted Spots
- Use Lightroom Presets and Photoshop Actions to Streamline Your Editing
Even if you’ve learned how to use a camera and mastered lighting essentials, you may find your images need some photo retouching after they are taken. Also, you may want to cultivate a consistent look and feel for the images you use on your blog or website. Learning how to edit photos can help you achieve these goals.
For the best results, you should rely on the best photo editing software and apps. Adobe Lightroom and Photoshop are the top-tier photo editing applications used by today’s photography experts. They require a bit of a learning curve—but anyone can master them with a little practice.
For simple on-the-go edits, you can use editing apps for mobile devices. These apps can be very helpful for editing photos on iPhone, Android phones, or tablets. One of the best mobile image editor apps is Photoshop Express. With this powerful tool, you can make simple photo edits and create collages using any mobile device.
You can find this free Photoshop app download in the App Store or Google Play store. Also, the free online Express Editor for Photoshop is available from Adobe, along with a free trial for its robust Creative Cloud suite. Many users get their start with Photoshop online for free then advance to more sophisticated tools.
You too can learn how to edit photos like a pro with the right photo editing software and a little practice.
1. Crop Images to Enhance Composition
At times you may capture an original photo that is nearly perfect—but still needs a few tweaks. In these cases, a simple crop may be all you need to make your pictures perfect. By cropping, you can remove extraneous background details to better frame the main subject of your photos.
In Photoshop, click on the crop tool from within the toolbox. Next, select your desired aspect ratio from the drop-down menu located in the upper right corner. You can select standard or custom ratios, or select unconstrained for a free-form crop. Drag the corners or edges to achieve the look you want. Now, press the enter key or click on the check icon to finish cropping your image.
If you’re using Lightroom, you’ll find the find the Crop & Straighten tool within the Develop menu—or you can press “R” on your menu to open the tool. Simply drag the corners to select the crop area. To use a standard aspect ratio, select the desired size from the Aspect menu. You can also enter custom sizes.
You can also use a free online photo editor to crop images. These photo editor online tools can be all you need if you don’t expect to make any other modifications to your photos.

2. Adjust the Exposure
If you want to learn how to edit photos, you need to know about adjusting exposure. First, you should know that exposure refers to the amount of light that your camera uses when taking a photo. Aperture and shutter speed both affect exposure.
An overexposed photo can look washed out. By contrast, an underexposed photo can seem dim and shadowy. Fortunately, it’s easy to adjust exposure using image editing software.
Photoshop has a suite of adjustment tools that you can access by clicking on Image in the menu bar and then selecting Adjustments from the drop-down menu. At first, you can learn how to edit photos with the Brightness/Contrast, Shadows/Highlights, and Exposures sliders. These are simple to understand. Other adjustments—such as Curves, Levels, and HDR toning—require more experience to master.
In Lightroom CC, you can use the Auto button under the Develop menu and Basic panel to make automatic adjustments. This can fix any exposure issues with one click. However, you may not always prefer the automatic adjustments—so it’s a good idea to know how to make manual ones.
Fortunately, Lightroom features sliders to make exposure adjustments easy. You can find the exposure slider below the Auto button. In addition, you can view a histogram, which tells you if the image features a lot of light, dark, or mid-tones. Lightroom offers sliders for blacks, whites, highlights, and shadows to make adjustments. You can use these tools to enhance both black and white and color photos.

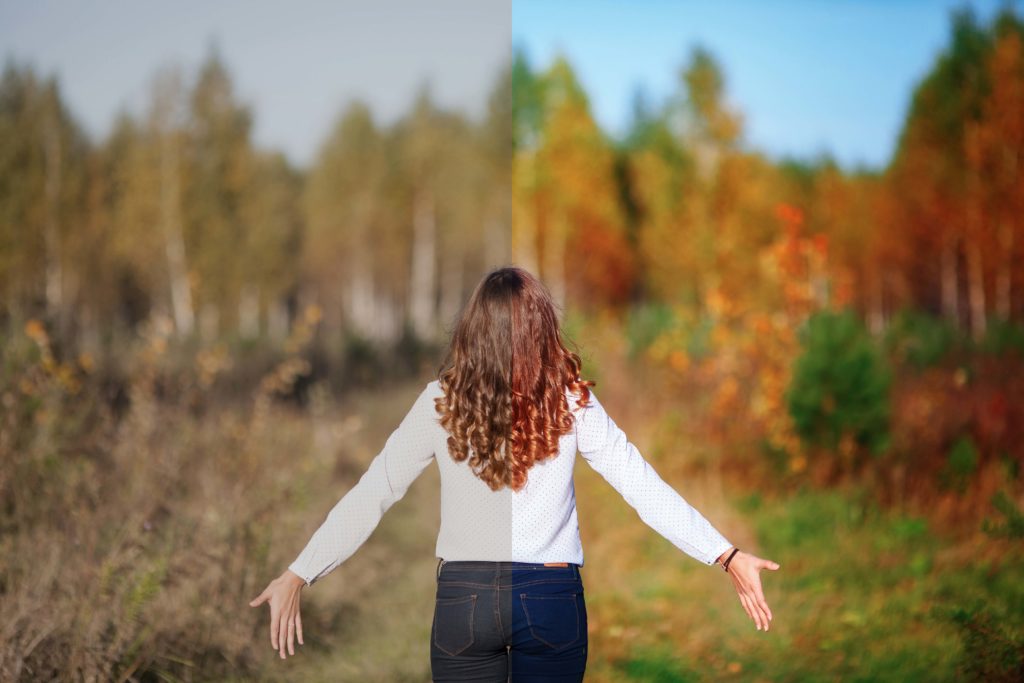
3. Make Color Correction Adjustments
When taking photos, you should always properly adjust the white balance setting of your camera. If your white balance is incorrect, your photo may have a color cast that affects its contrast, saturation, and vibrancy. Fortunately, you can usually fix any color issues during the editing process.
In Photoshop, you can use the color balance tool for these adjustments. Under the Menu Bar, click Image, then Adjustments, then Color Balance. Now, choose the tones within the image that you desire to change and click the Preserve Luminosity box. You can click the Preview box to view the adjustments—and use the sliders to reach your preferred color balance.
Photoshop also lets you select a single color exclusively. This can be a good choice if one color appears off, but the rest of the colors in your photo work well. For this approach, select Image from the Menu bar, then Adjustments, then Selective Color. Next, click on the Preview box to see your changes as you make them. You can choose Relative for more subtle changes or Absolute and then choose the color from the drop-down that you wish to change. Now, use the sliders to enhance or diminish the chosen color.
You can use Lightroom for color correction as well. Select the White Balance tool within the Basic panel of the Develop module. This tool appears as an eyedropper in the top left corner of the Basic Panel. Be sure to deselect the Auto Dismiss checkbox to keep the tool open. Now, click on the image in a spot that appears to be a neutral gray. You may need to click on a different area of the image to achieve the adjustment you desire. Once you do, return the White Balance Selector to its original space or press Escape.
If you need to make additional adjustments to parts of the image, use the HSL panel. Click HSL, then Saturation—and then click on the Targeted Adjustment Tool. Select a point of the image and drag the tool upwards or downwards to fix the color saturation. You may need to repeat this process with Luminance—which is also available under the HSL panel—if parts of the image appear too light or dark.
Color correction can take some trial and error to master. But it’s one of the most important skills to gain if you truly want to learn how to edit photos like a professional.
4. Eliminate Unwanted Spots
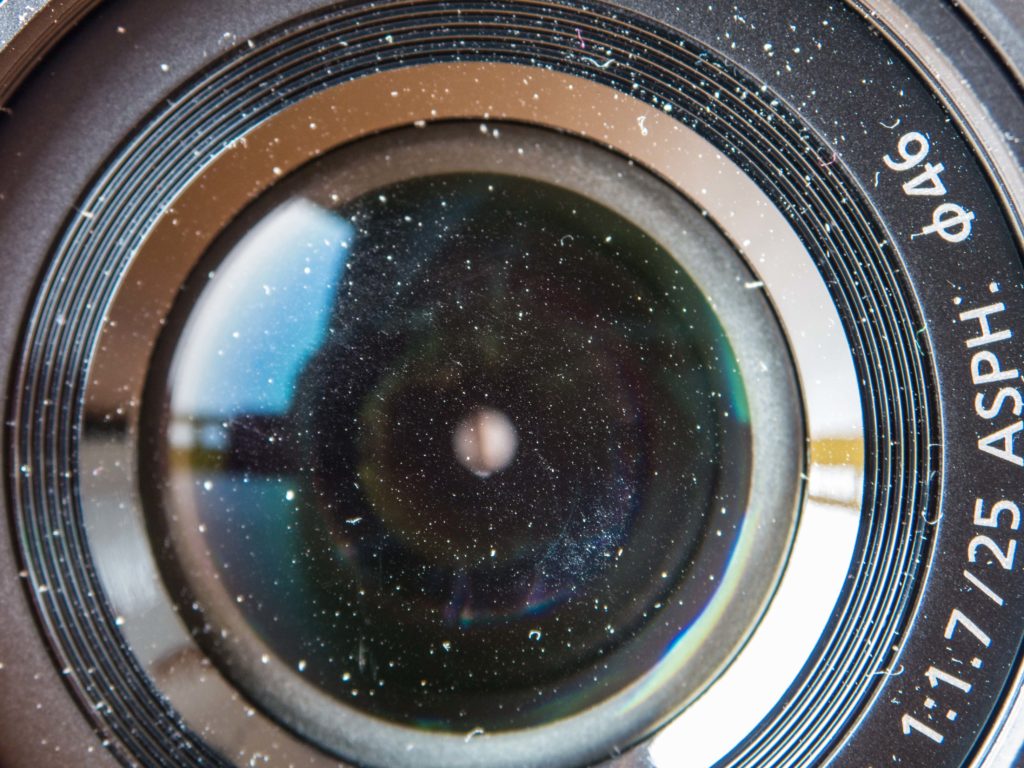
At times, you may need to make selective corrections to remove any spots, blemishes, or imperfections. One way to avoid these types of edits is by making sure that your camera lens is clean and free of dirt, grime, and specks of water before taking pictures. However, it’s good to learn how to edit photos to remove these flaws.
Within Photoshop, there are four tools you can use to edit spots and imperfections. These include the Spot Healing Brush Tool, the Healing Brush Tool, the Patch Tool, and the Clone Stamp. Lightroom also features a Spot Removal tool. Often, professional photographers can accomplish up to 90% of necessary fixes within Lightroom—and only turn to Photoshop for more complex retouching.
To use the Lightroom Spot Removal tool, click “Q” on your keyboard. You will now see a circle that shows the size of the area that will be affected. You can use a slider or the wheel on your mouse to adjust the size of the Spot Removal tool and click on the spot you want to remove. Alternatively, you can use the Spot Removal tool to clone another part of your image and place it over the blemish. Lightroom lets you Clone other parts of the photo directly or use Heal to make the fix a little more subtle.
5. Use Lightroom Presets and Photoshop Actions to Streamline Your Editing
It’s always a good idea to learn how to edit photos using manual adjustments. However, you can save significant time by using professional Lightroom presets and Photoshop actions.
With a Lightroom preset, some or all of the sliders are set to predetermined positions to optimize the look of your photos. You can buy packaged sets of Lightroom presets that fit a specific theme—and use them over and over. Some presets help you liven up colors, while some create a moody or subdued vibe. Other presets are perfect for touching-up outdoor images with some fine-tuned to the unique nuances of indoor photography. Presets are valuable tools when you need to edit multiple photos in Lightroom.
Photoshop actions also let you cut steps out of your photo editing process. They replicate a specific series of tasks—which can allow you to resize a photo, apply adjustments or effects, and save the file with the press of a single button.
Both Photoshop actions and Lightroom presets can be especially valuable if you have batches of photos to edit and need to save time. This can occur if you’re posting a new blog article that uses photos to illustrate key points or if you are adding a gallery of images to your small business website.
For the best results, you can purchase Lightroom presets and Photoshop actions crafted by professional photographers and photo editors. These tools can help you publish top-quality photography on your blog or site with minimal effort on your part.

Boost Your Image Editing Skills and Make Your Photos Shine
Learning how to edit photos is an important skill for every blogger or small business owner—especially those who are just starting out. Hiring a professional photographer or photo editor is costly and often unnecessary. Anyone can learn how to use photo editing software and produce top-quality images that tell a compelling visual story.
Cropping is one of the most basic ways to edit photos, and it can make a dramatic difference in the composition of an image. You can also learn how to correct exposure to prevent your pictures from looking too washed-out or too-shadowy.
Learning how to make color corrections can eliminate unwanted color casts. By mastering basic spot removal techniques, you can ensure that a minor imperfection doesn’t ruin a brilliant photo. The editing skills you learn for your blog can also be applied to Instagram or other social media outlets.
Of course, as a small business owner or blogger, your hands are already full as you juggle many tasks. Setting aside time to perfect your photo editing skills is important—but can easily fall to the bottom of your to-do list. You can always rely on professional-grade Lightroom presets and Photoshop actions to cut down on the time you spend editing photos. To keep costs in check, you can get started with free Lightroom presets and grow from there. The right Lightroom presets can make your job so much easier. You can use them to edit batches of photos and achieve a consistent look for your photos to promote your brand and visual identity.
These skills will serve you well as your business or blog grows. And it’s possible you could learn enough to become a photo editing professional yourself. Get started learning how to edit photos today and envision a positive and profitable future!