
Capturing a perfect portrait, still
7 Tips for Capturing the Perfect Sunset and Sunrise Pictures During the Golden Hour
- Find Out the Exact Time of the Golden Hour in Your Locale
- Arrive Early to Set Up Your Shoot
- Adjust Your White Balance
- Choose the Right Aperture
- Increase Vibrance by Underexposing
- Keep Shooting and Try Different Angles
- Refine Your Images During Post-Processing
You’ve likely seen and admired golden hour photos. They typically feature warm tones, a gold glow, and a dreamy or ethereal quality. Others may have gorgeous bokeh effects, soft hazes, or vibrant lens flares. Even if you’re a beginning photographer who is learning to style photo shoots, you can take advantage of golden hour lighting and capture a lovely shot.
What is the Golden Hour for Photography?
A first question many photographers ask is: What is the golden hour? Simply put, the golden hour occurs twice each day. It is the hour after the sun rises and the last hour before sunset. The exact time of the golden hour varies each day—and also depends on the current time of year and your geographic locale.
What makes golden hour photography so special? First, as the sun rises and sets, the light source is now closer to the subject of your photograph. This lets you achieve some unique lighting effects and silhouettes. And the sun’s rays pass through more of the earth’s atmosphere, which produces soft, diffused light.
Many photographers prefer working with this soft lighting since it does not create harsh shadows or strong highlights. Images taken during the golden hour usually have a flattering warm color temperature that you can enhance or adjust during post-processing.
Because of these qualities, it’s not surprising to understand why professional photographers consider the golden hour an ideal time for an outdoor photo shoot. Some even refer to it as the magic hour.
With golden hour photography, you can achieve some amazing looks for your photos without the need for extra lighting equipment. Here are a few ways to take advantage of the golden light available at dawn and dusk:
- Front Lighting: Ask your subjects to face the sun so that they are covered in soft, even lighting. Front lighting has a wonderful effect on skin tone—which makes it a perfect time for any type of portrait photography, including fashion photography. And since the sun and low and less bright than other times of day, your subjects won’t feel a need to squint.
- Backlighting: Keep the sun behind your subject’s back to create a beautiful warm glow. You can also use this approach to achieve rim lighting—which makes a golden glow appear around your subject.
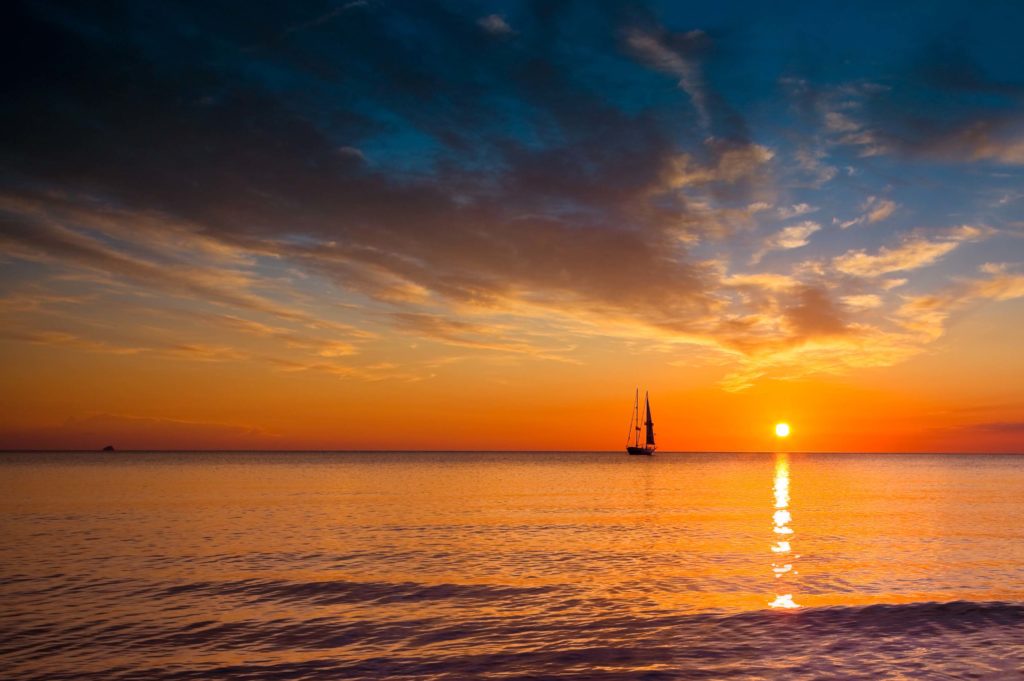
- Silhouettes: Have your subjects stand in front of the sun to block it out fully and shoot towards the light source. This backlighting technique lets you capture some lovely silhouettes.
- Lens Flares: Tell your subject to stand in front of the sun, but don’t block it fully. With this backlighting technique, you can produce glowing, rainbow-hued lens flares. Try shooting from different angles and experiment with different lenses and apertures to gain varied lens flare effects.
- Bokeh: Face the sun and shoot with a wide aperture to achieve gorgeous bokeh effects. You may want to use bokeh as a background for portraits or nature subjects.

When you’re first learning about golden hour photography, you may just want to head out with your camera in the evening or early morning. You can practice working with golden hour lighting techniques to gain essential skills. Once you’ve mastered the basics, you can use golden hour photography best practices and professionalize your approach.
1. Find Out the Exact Time of the Golden Hour in Your Locale
Keep in mind that the golden hour is a short window of time. Depending on seasons, locations, and weather conditions, it can be as short as 20 minutes. On cloudy or rainy days, you may not have an opportunity for golden hour photography at all.
To maximize your shooting opportunities, you need to know the exact time of sunrise and sunset in your area. Those time vary day by day. You can get a rough idea by searching online to find out when is sunrise or what time is sunset today. However, there are better ways to get the very specific insight you need to plan your shoot.
Finding out what time is the golden hour is easy with an online golden hour calculator. With these tools, you can enter the location of your shoot to determine the precise times for the golden hour. You can also find golden hour calculator apps that you can use while on-the-go.
2. Arrive Early to Set Up Your Shoot
Since the golden hour can pass quickly, you don’t want to waste any precious shooting time. Your best bet is arriving at your shoot location at least an hour early to set up. That gives you ample time to set up your equipment and observe the surrounding area.
Study the skies and note the appearance and movements of clouds since they can affect sunlight available for your golden hour photography. Clouds can make sunlight more vibrant or blot out the sun completely.
When the golden hour starts, you’ll want to shoot quickly to capture as many images as possible—without sacrificing composition, of course. You don’t want to lose minutes fumbling for equipment or adjusting camera settings, so be prepared. Before you start shooting, take time to coach your subjects on poses and expressions to achieve the best golden hour portraits. These photography tips can help you make the most of the limited time during the golden hour.
3. Adjust Your White Balance
For successful golden hour photography, you’ll need to adjust your white balance manually—even when you are shooting in RAW. If you set your camera to auto white balance, your camera will automatically compensate to reduce the warm, golden hues you desire. This can cause your photos to look much bluer than you intended.
To start, set your white balance to “cloudy” or “shade.” This will help preserve the warmth and may even add more golden tones to your images.
4. Choose the Right Aperture
Golden hour photography is a great choice for both portrait and landscape photography. However, you’ll need to adjust your aperture differently for each type of image.
For golden hour portraits, you may want to use a larger aperture opening to produce a shallow depth of field. This approach lets you create beautiful bokeh for a dream-like appearance. You’ll also find that golden hour photos feature flattering natural light that gives your subjects’ skin a natural glow.
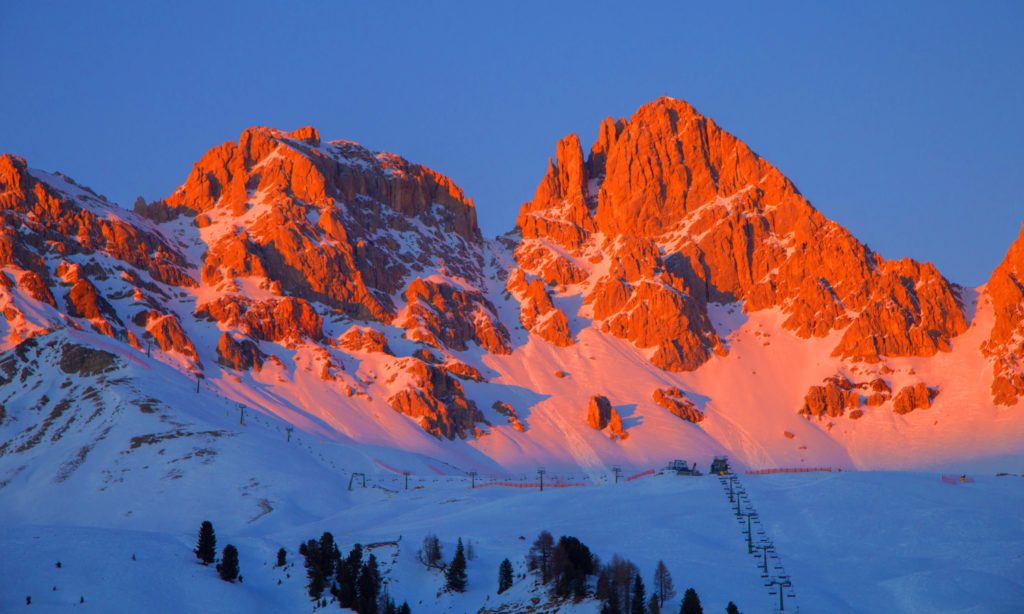
Landscape photographers need to take a different approach. To get as much of the landscape in the photo as possible, use a smaller aperture opening. This lets you achieve a large depth of field while capturing the warmth and natural beauty of the landscape.
Also, experienced landscape photographers recommend using a tripod for golden hour photography. A tripod lets you use a slower shutter speed to capture more detail and produce a clear, sharp image.
5. Increase Vibrance by Adjusting Exposure
If you want to emphasize the natural vibrancy of dawn and dusk, you may try underexposing your image slightly. You can lighten up your images during post-processing, if necessary. However, if your golden hour images are overexposed, it can be harder to darken them. This technique works especially well if you are photographing the sunset or sunrise.
6. Keep Shooting and Try Different Angles
The sun will be moving quickly during the golden hour—and sunlight changes from minute to minute. That’s why professional photographers recommend taking as many photos as possible during the golden hour.
Experiment with angles to make the most of golden hour lighting. A slight change of position can produce different colors and lens flares. Don’t be afraid to take a leap into the unknown and try out camera angles you’ve never explored before. The lighting effects that you achieve may be brilliant!
7. Refine Your Images During Post-Processing
After your photo shoot, you may find your golden hour photos need some attention during post-processing. You can use Lightroom to highlight specific colors and enhance the natural golden glow.
Although you can always make manual adjustments during post-processing, many professional photographers prefer to work with Lightroom presets. With Lightroom presets, you can save time by applying Lightroom actions with just one click. This can be especially useful if you’re batch processing golden hour photos from a shoot or if you are aiming for a consistent look and feel for your photos.
Always look for presets designed by professional photographers and expert Lightroom editors. Make sure you understand the adjustments the preset makes—and view before and after photos wherever possible. This will help you select the best possible preset collections so that you can maximize the beauty of every golden hour photo.
Access the Magic of Golden Hour Photography
By shooting at the golden hour, you can elevate the quality of any photograph. Follow our expert tips for the golden hour photography to set yourself up for success.
Planning is absolutely critical for golden hour photography. You’ll need to know the exact sunrise or sunset time for your location. For best results, rely on a golden hour calculator to find the right golden hour shooting window. Be sure to arrive early to prepare for your photo shoot. Observe the clouds, weather, and landscape so that you are ready to take advantage of the rapidly shifting shooting conditions during the golden hour.
You’ll need to know how to make some manual camera adjustments—including white balance, aperture, and exposure—to achieve the effects that you desire. Practice this in advance so that you don’t spend too much time adjusting settings and focus instead on capturing the magic of the photography golden hour.
Take a lot of shots from many different angles. Sunlight is changing rapidly during the golden hour—and you never know when you might achieve the perfect lens flare or bokeh effect. You can always enhance photos during post-processing using Lightroom presets to achieve the golden hour look of your dreams.
Even if you’re brand new to photography, you can experiment with taking golden hour photos. Start by finding out the time of sunset today or sunrise tomorrow. Then head outside at the right time to take some golden hour selfies. From this simple first step, you can set your sight on advancing your golden hour photography skill. Before you know it, you can be taking quality portraits, still life photos, or landscape images that feature the warm glow present during the golden hour.